So you've heard about VR goggles and you want to get an idea of what they do. Well, you might have the most important part of it already. A smartphone makes a great head mounted display (HMD) because many of them are capable of high resolution video and contain gyroscopic sensors that provide motion feedback to the software. The sensors are not fast enough to prevent the vertigo effect but you'll get an idea of what this technology has to offer. For this project I used a Samsung Galaxy S4, a hand-me-down from my wife, bless her heart.
One reason why I chose K'NEX is that I wanted it to be adjustable. My vision is pretty bad (-6.0/-6.5 dioptres) and having tried other video glasses before, I know it's better to use HMD goggles without prescription glasses or contact lenses. I also want to be able to adjust the focus of the lenses and the screen distance while wearing. If I used anything more rigid, it would be difficult to get the dimensions correct, requiring many iterations of teardown and rebuild to adjust. I don't have time for that. If you don't like building things, the Durovis Dive is in production and it serves the same purpose. However, if you do like making stuff, read on.
Here's the parts list:
| 1) Two aspheric 5x magnification loupe lenses. The lenses are held in with a rubber O-ring and the lens holders can be connected with epoxy to make a lens frame. |  |
 | 2) A box of assorted micro K'NEX. Make sure you have plenty of the smallest rods and connectors. They come in handy for making the final fitting adjustments. |
| 3) ESS Land Ops safety goggles. These have the perfect spot for attaching the K'NEX rods and now that the war is over, you can pick 'em up cheap on ebay. 4) One smartphone. The S4 has one of the highest resolution screens out there.  |  |

5) Some other tools and materials that help are: quick-set epoxy, a Dremel or Proxxon rotary tool, and a compass (from geometry class).
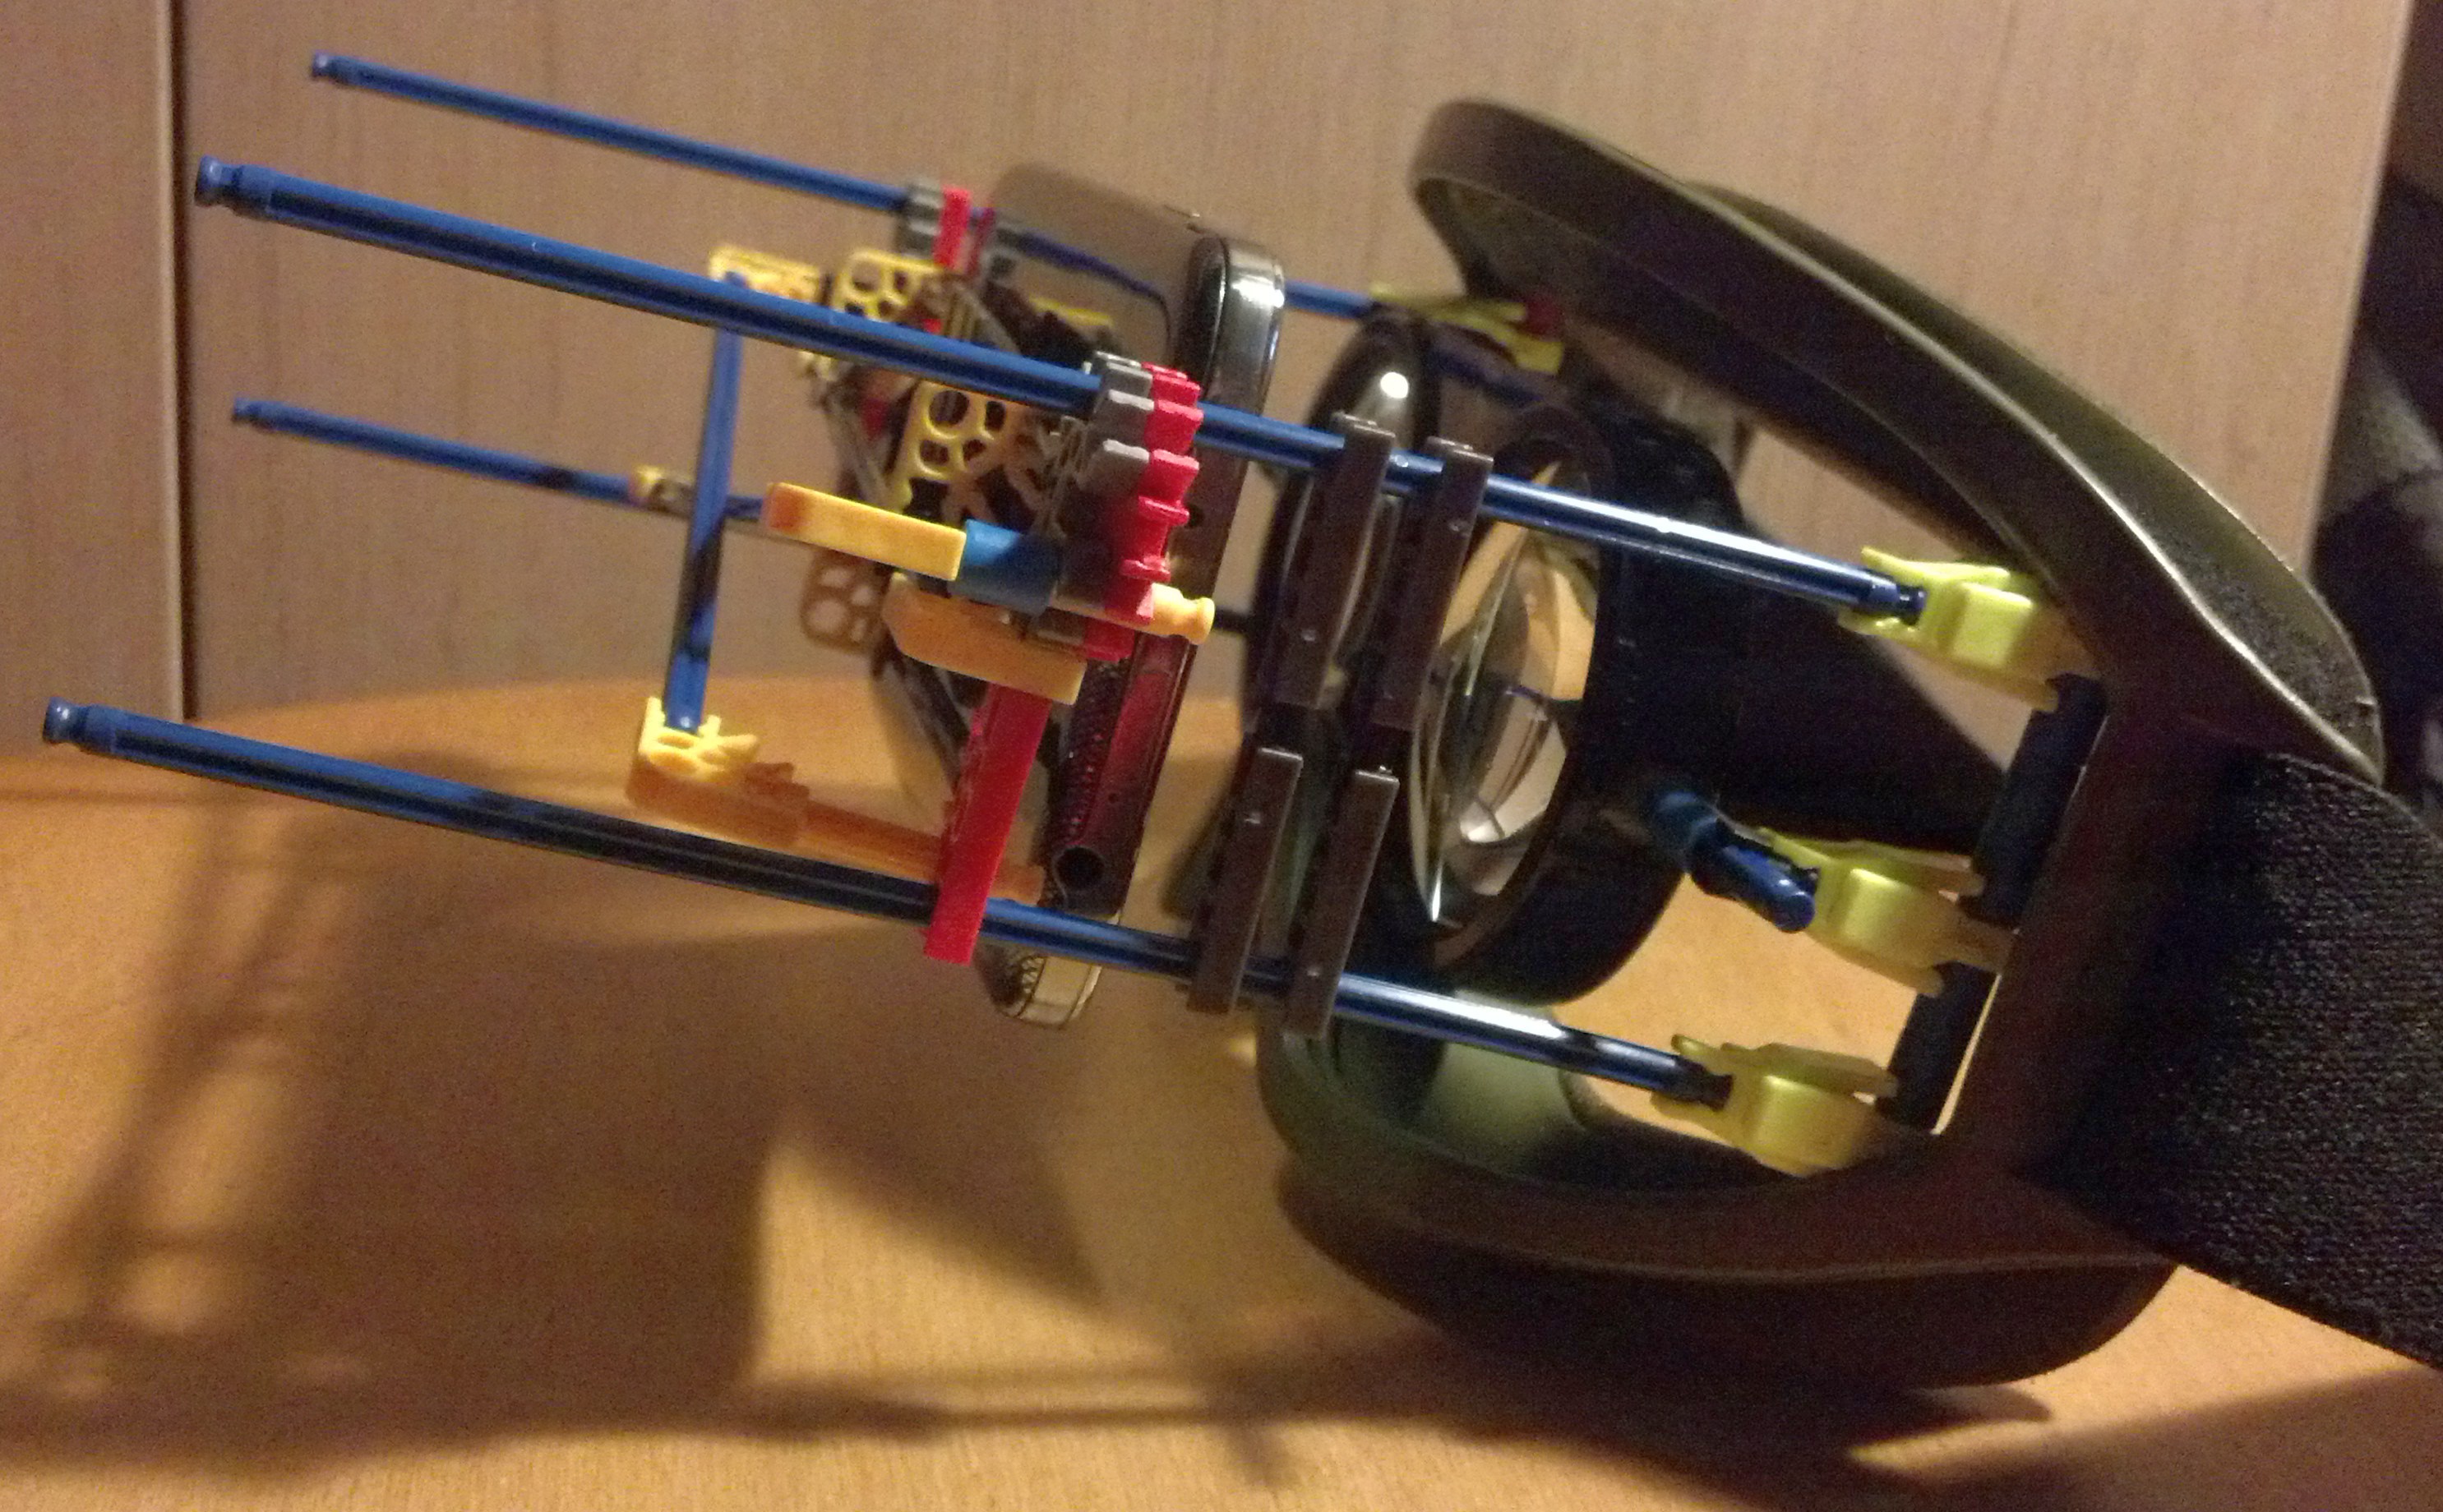
Slap all that together and you get this:

VR goggles any 9+ year old kid could build.

Step 1: Measuring Interpupillary Distance (IPD)
The first issue you run into with commercially available VR goggles is the fact that everybody's faces are different. Manufacturers design adjustment mechanisms to compensate for this. For the same reason glasses need to be fitted by an optician, the lenses in the goggles need to be built to match the distance between the wearer's eyes. This measurement is known as interpupillary distance or IPD. Although a little goofy, it's not impossible to measure your own IPD. What I did was tape an index card straight across the top of my eyes. Then standing in front of a mirror, I used a black marker to mark on the index card right above my pupils. After that, use a ruler to measure IPD. Take note, when you look into the distance, your IPD increases a little bit. This won't come as a surprise if you've ever crossed your eyes by looking at a finger in front of your nose. Relax your eyes and look into the distance when measuring your IPD. We don't want to be staring cross-eyed when goggling in!

Next, pop the lenses out of their ring holders and trace the perimeter of the lens holder on paper. Using a compass, I found the center of the circle on paper and the radius of the circle. After that, use a ruler to draw a line on paper, the length of your IPD. This will be the distance between the centers of lenses. With the compass, circumscribe two circles at the each end of the line. Now we have a pattern for a lens frame that centers each lens directly over each eye.
 | 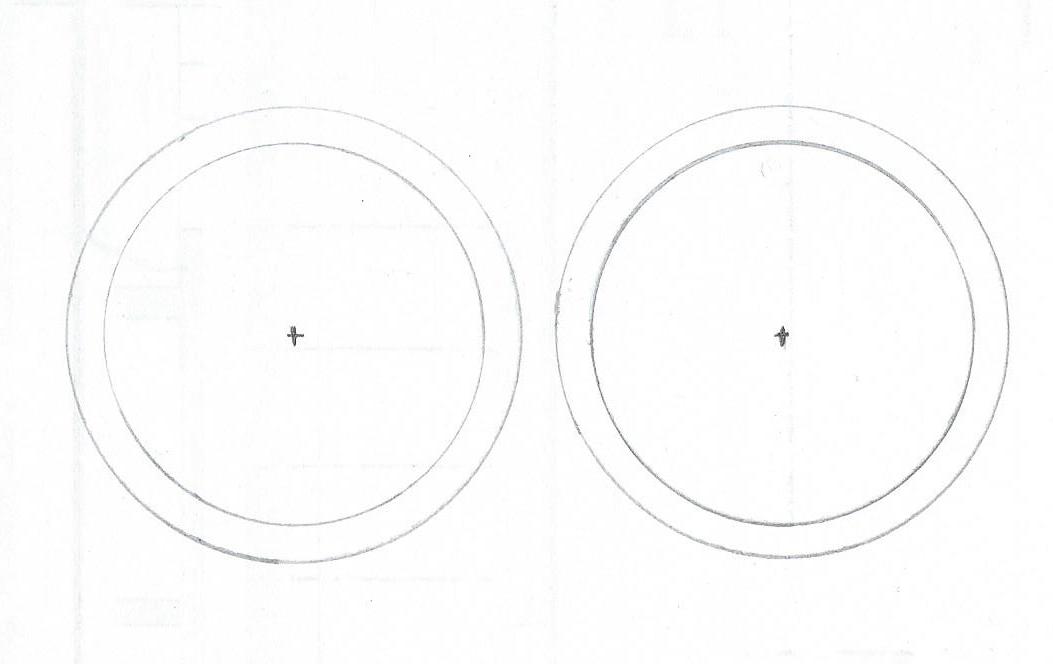 |
Using cut pieces of K'NEX rods, an old credit card, and a generous amount of quick-set epoxy, make a lens frame that can be snapped into any K'NEX stucture. I recommend using a little epoxy to set the shape first. After that cures, use a little more epoxy to fill in the gaps. After that, more epoxy can be used for strengthening the frame. A rotary tool comes in handy here for shaping down.


Step 2: Assembling the Mask
These photos show the perfect place to attach K'NEX rods to an ESS mask. Just put a hole in each the circular indentations that are located at the four corners of the mask. I drilled the holes with a Proxxon, but a thumb tack would probably work too. After that, a red micro K'NEX rod snaps in perfectly.
 |  |
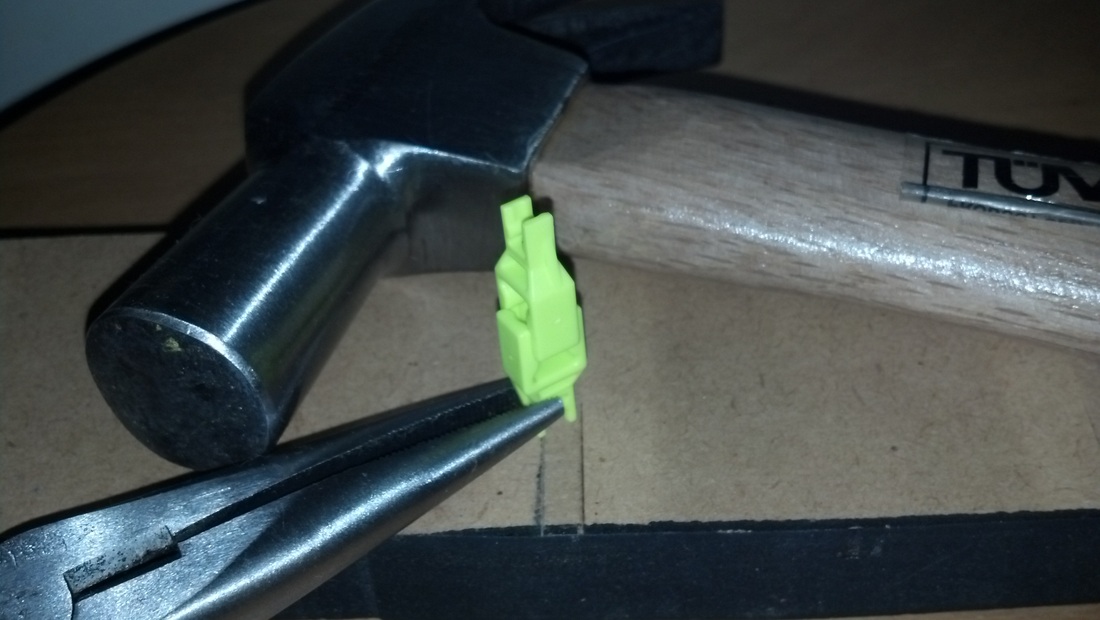
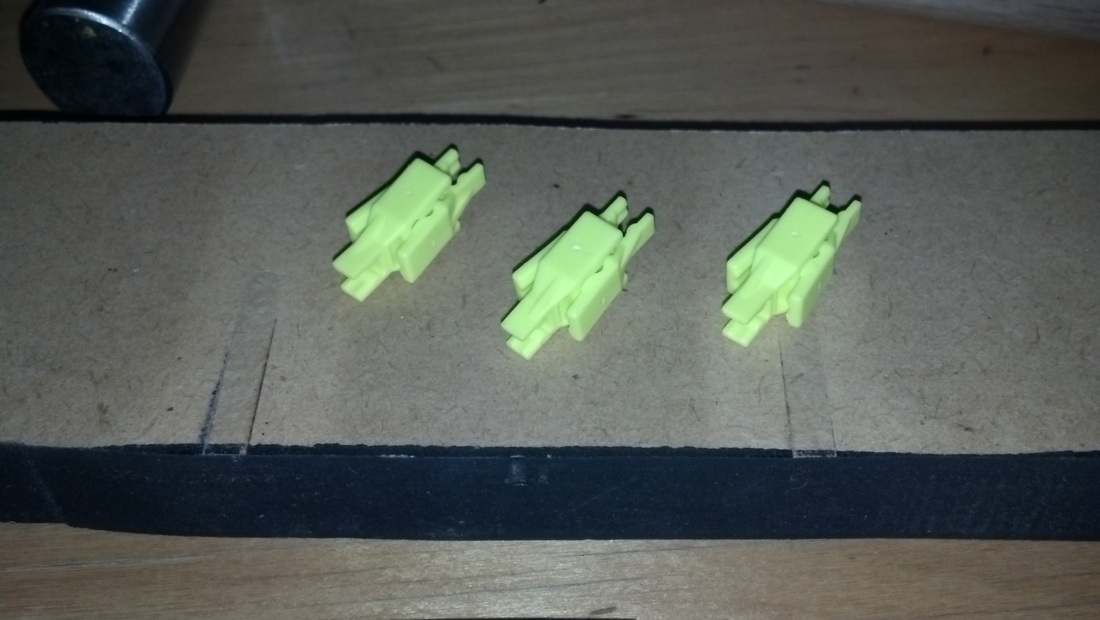
One problem that I run into when building stuff out of K'NEX is that there are no compact perpendicular connectors for connecting rods in a "T" shape. Why not? It seems like a perfectly reasonable connector to have. I had to make my own by smashing together two yellow micro-to-standard connectors with a hammer and pliers (to keep my fingers from getting smashed too).
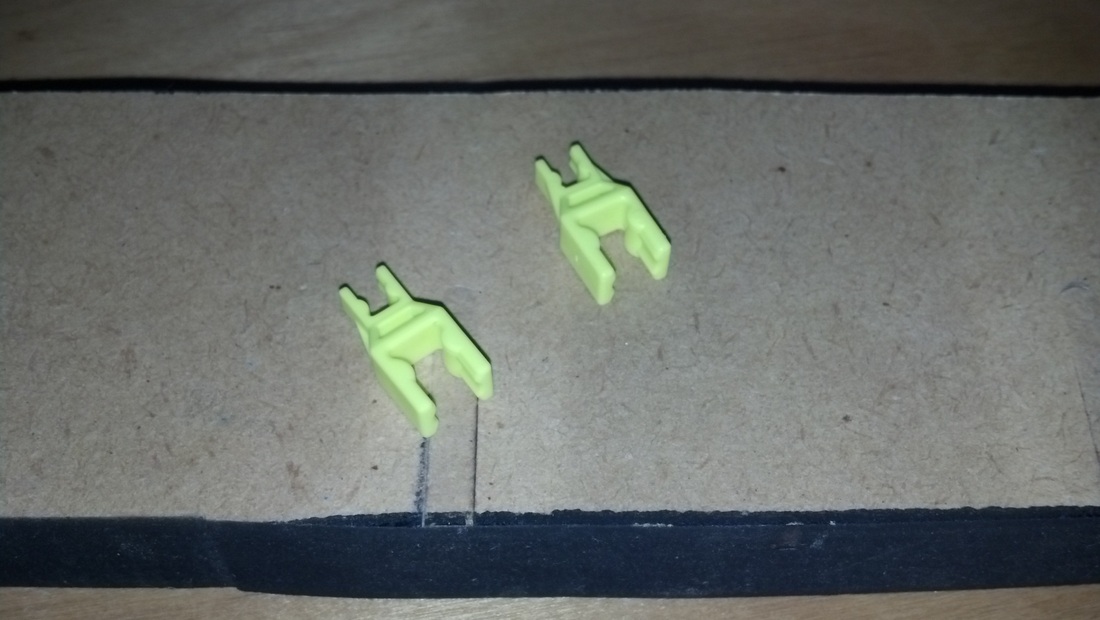 |  |
This is a key connector for this build. You will want at least six of them.
Step 3: Integrating it all Together
It's now time to snap the whole thing together. After trying on the goggles, it's a good idea to use spacers and various reinforcing rods to make it studier. I actually sat on mine when stumbling around in the dark like a dumb ass. Nothing broke, it just snaps back together.

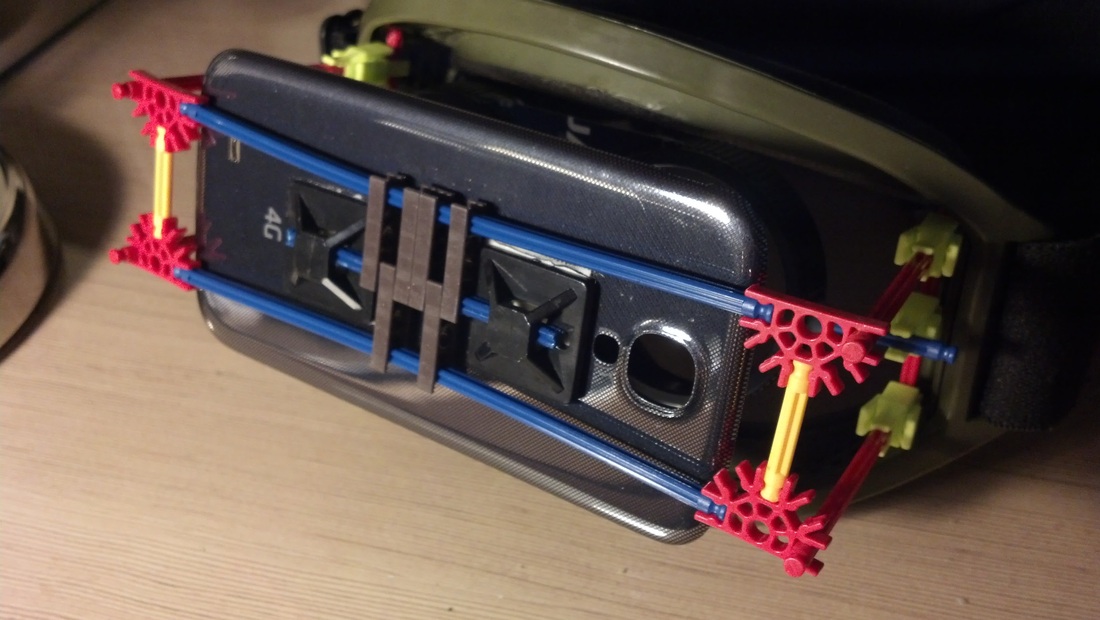
After that, you can get creative with attaching your phone. I used adhesive zip tie anchors stuck directly on the back cover of the Samsung S4 with a K'NEX rod jammed through it.
Now go and check out some of the cool apps out there for smartphone VR. You might even try making an infrared LED head tracking clip based on FreeTrack. Some of the problems that smartphone VR has is poor controllability and high image latency. Gaming is difficult to impossible on this particular platform, but at least you'll get an idea of how games and other applications can take advantage of virtual world interfaces. Have fun and don't fall down any real stairs.
 RSS Feed